Welcome

Shopping Cart

•••••

Your cart is currently empty.

Blog

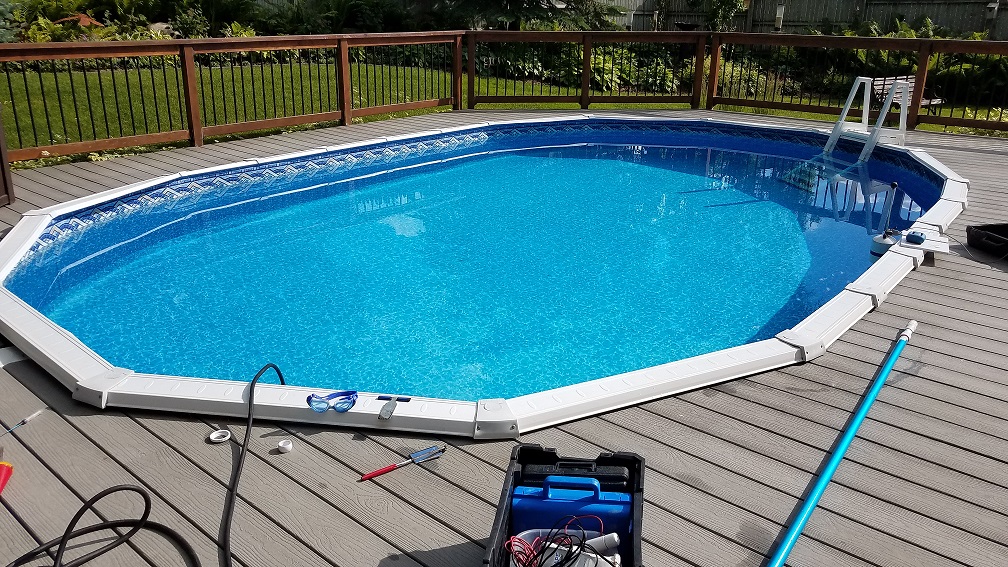
Case Study: Above Ground Pool With Multiple Leaks


Type of Pool:

Above Ground, Vinyl Liner

Equipment Used:

LeakTrac 2400Dye Testing Cones, Pressure Testing Equipment

Situation:

Pool owner noted water loss of 1.5” per day and hinted that they thought the liner needed some patching.

Solution:

Since the LeakTrac 2400 can pinpoint liner leaks in above ground pools too, we started by doing a liner scan. It can be a little harder to find a good ground source on above ground pools, but at this pool we were able to attach to the steel wall, which gave us a great connection.   We promptly located and patched a small liner leak under the ladder. It didn’t seem to be big enough to be responsible for 1.5” per day of loss, so we kept looking.

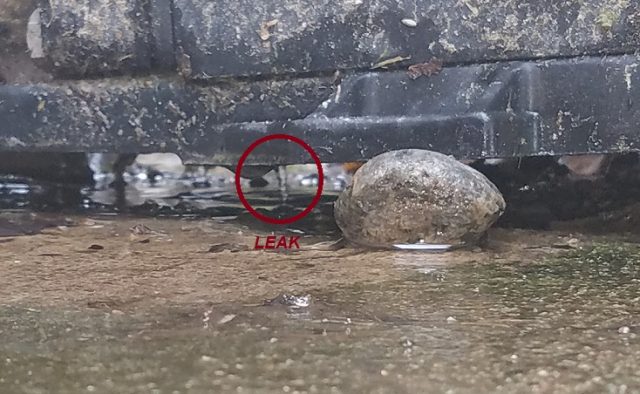
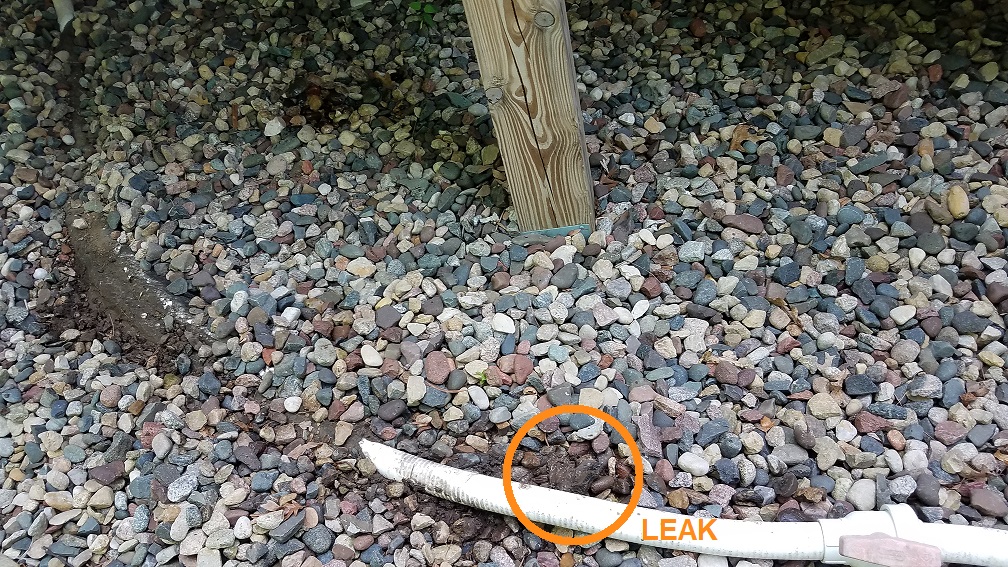
Since the liner was eliminated from being a source of water loss with the LeakTrac, we set up the Dye Testing Cones to do a static dye test of the plumbing, which revealed a potential leak in the return line.  A failed pressure test of the return line confirmed it was leaking.  This was sort of peculiar since the line was primarily visible and dry.  Once air was induced, we noticed it  bubbled up through the rocks in the short area the line was actually underground. In a little over an hour we had found and patched the liner leak and pinpointed the pipe leak.

Highlights:

  • The LeakTrac 2400 works great on above ground vinyl liner pools, you may just have to get creative with your ground connection.
  • It’s easy to pinpoint leaks in pipes that are close to the surface, just keep your eyes open!

Case Study: Not What We Suspected

Type of Pool:

Vinyl Liner

Equipment Used:

Leakalyzer, LeakTrac 2400, Pressure Testing Equipment, Dye, Leakmaster Pool Glue

Situation:

We were at least the second company to take on this job, so the homeowner was concerned about how we could be sure that all the leaks were found. She was also convinced that the leak was in the return side plumbing.

Solution:

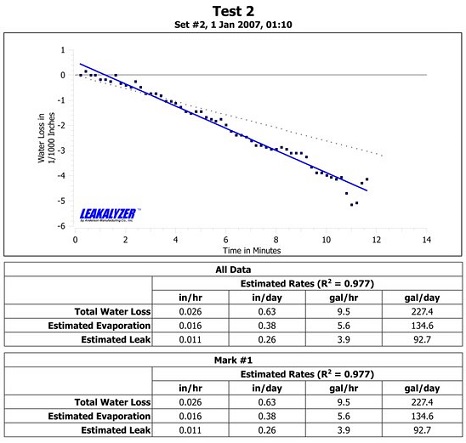
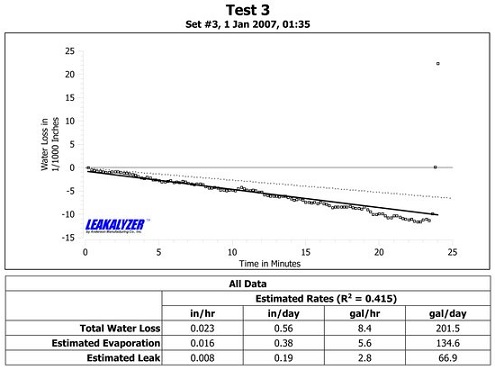
We started pump on/ pump off test with the Leakalyzer and found that the pool was losing more water with the pump running. This usually tells us to suspect pressure side plumbing.

We had two techs on this job, so one tech began running a pressure test while the other ran a vinyl scan with the LeakTrac 2400.  The pressure test on the pressure side plumbing held, but the LeakTrac was getting a stronger than normal signal coming from the skimmer.  We did a quick dye check of the skimmer and  sure enough the bottom of the skimmer bowl was cracked. The movement of water in the skimmer, or possibly even a slight shift in the suction pipe when the pump was running caused more water loss.  This was a rare situation where higher water loss with the pump running wasn’t an indication of a pressure side leak.

We repaired the skimmer bowl with Leakmaster Pool Glue and fiberglass mesh, which provides a permanent repair that will be able to handle the movement of the pool as time goes on. We charged the homeowner an additional fee for this repair. Once the repair was done, a final Leakalyzer test confirmed the now repaired skimmer leak was the only leak.

Highlights:

  1. Remember that pump on/pump off tests only provide suspicions of where the problem is.  Further tests are needed for confirmation.
  2. LeakTrac can indicate a leak in the skimmer with higher than normal intensity.
  3. Count on your own observations, diligence and reason more than what other people tell you.

Time Saving Products and Tips for Leak Jobs


Too many leaks and not enough time? Check out this list of time-saving products and tips to help you cruise though leak jobs as efficiently as possible.


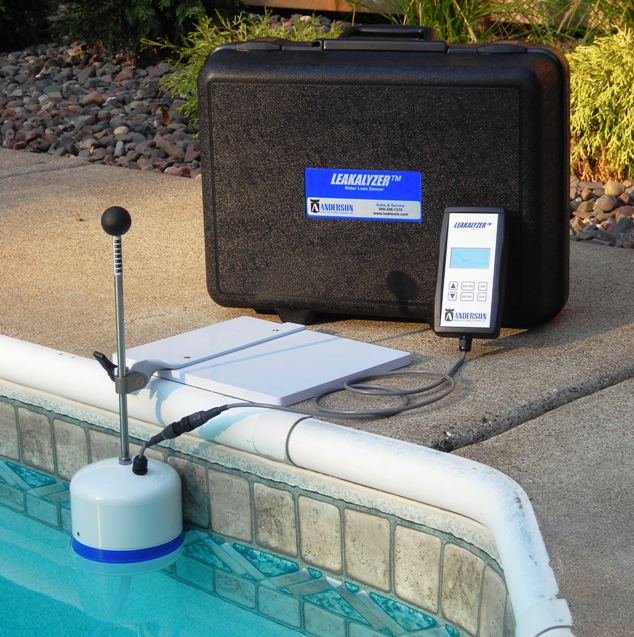
1. Avoid callbacks by confirming all leaks have been found and fixed with the Leakalyzer.

Leaks can be deceiving, and even though you may think you’ve found the only leak in the pool there could be other smaller ones still hiding. Avoid having to return to a job site multiple times by running a Leakalyzer test before leaving to confirm the water level is no longer dropping. This ten minute step can save you hours of time!


2. Use Dye Testing Cones to quickly isolate problem plumbing areas.

Dye Testing Cones are a quick way to identify the flow of water in and out of pipes before starting a full pressure test. They can also be used with the Leaklyzer to isolate the shell of the pool or different lines while running tests. While they shouldn’t be a replacement for the definitive information pressure testing can provide, they can quickly help narrow your search area.


3. Spend less time inspecting vinyl liners by pinpointing leaks in minutes with the LeakTrac 2400.

There is no better way to find tiny punctures and tears in vinyl liners than with the LeakTrac 2400. Over the last 25 years, LeakTrac users have saved thousands of hours that they otherwise would have spent diving and dye testing.


Man uses LeakTrac 2400 near skimmer
4. Make sure to get complete and accurate information from customers before even arriving at the job site.

Asking the right questions of pool owners can save a lot of time during the information gathering step of a leak detection and lead you to to the leak faster. Check out our blog post for a guide to how to have a conversation that will make your actual time on the job more efficient.


5. Choose repair materials that are versatile, convenient, and work fast.

With a cure time of only 5 minutes,  Leakmaster Quick Set Putty is a great option for when you have limited time to make a repair, but still want something durable and long-lasting. Also, check out our pre-cut, clear Vinyl Paches that come in a variety of sizes and are the thickest on the market.


6. Avoid the extra step of purchasing and filling SCUBA tanks by using a Super Snorkel Tankless Dive Unit.

The Super Snorkel tankless dive unit makes diving a breeze and eliminates the need for extra stops to refill bulky air tanks. As much as many of us wish it wasn’t, diving is always going to be ultimately unavoidable in performing consistently successful leak detections, so it’s worth it to have a nimble, easy dive setup to make it as pain-free as possible.


7. Use Anderson Manufacturing to quickly guide you to the solutions and equipment you need.

Save time by calling us to help you determine what products will work best for your specific needs instead of spending time researching on your own. We’re driven by finding the best solution for you to be effective and profitable! We are also able to ship most orders on the same day they’re placed – so you can rely on us to fulfill orders fast.


How To: LeakTrac Tune Up

Use the following steps to tune up your LeakTrac for a busy season or to address performance issues.  If you’re stumped or would rather have us do a complete tune up you can send your unit into Anderson Manufacturing to be serviced. Just call and give us a heads up that it’s coming!

What You’ll Need

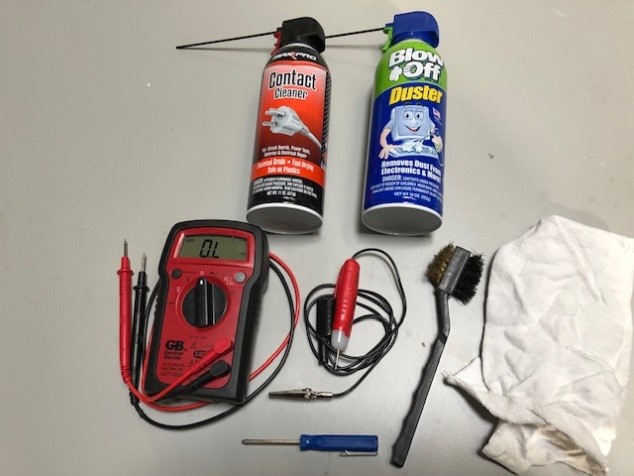
  • Electrical Contact Cleaner
  • Canned Air Duster
  • Volt Meter / Continuity Tester
  • Clean Cloth
  • Small Phillips Screw Driver
  • Small Brush
  • Steel Wool


Float and Ground Cables

The best place to start is a visual inspection of all cables for any nicks or breaks. The black float cable and the red ground wire are both single wire, so they are especially susceptible to damage. If there are any problems with these cables, replacements can be bought here.

The metal spring clips on the banana plugs at the end of the cables can get dirt under them after continued use and cause a poor connection. To clean, spray the banana plugs with contact cleaner, then squeeze the plug with a clean cloth and twist back and forth. Repeat this process a couple times then spray them off with the air duster.

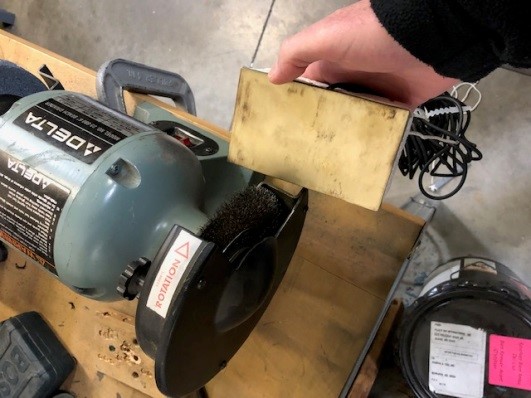
Next, using some steel wool or a wire grinding wheel, clean the brass plate and the red alligator clip. Both of these can get rust or corrosion on them and cleaning can improve the connection.
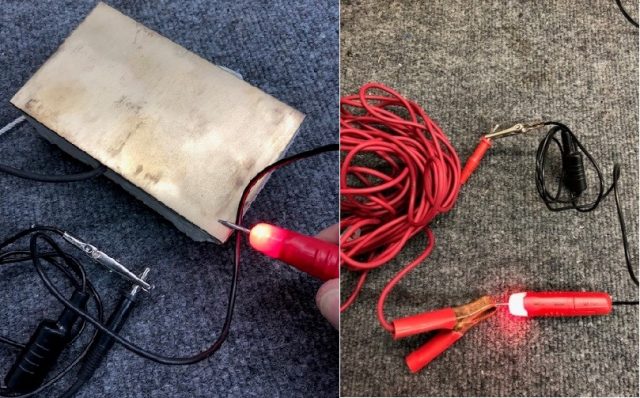
Finally, using the continuity tester check the cables by placing the tester leads on each end of the cables to make sure you have a good connection on each end.
Probe

Remove the PVC caps from each end of the probe. Using contact cleaner, spray the gold contacts and wipe off any dirt or corrosion with a clean cloth.

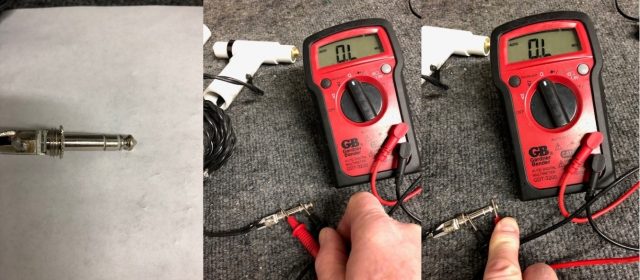
Next check the 1/4” plug and the cables. Using a volt meter on the Ohm’s setting, check the continuity between plug and the gold contacts. Place one of the meter leads on the tip of the plug and the other meter lead on the non-directional end of the probe (the end without the black band). If the wire and connections are good then the meter will give you a reading that there is resistance. If the meter indicates a zero reading then the probe has a broken wire or loose connection and the probe should be replaced.

Repeat the above process to test the other side of the probe. Place the meter lead on the second or middle contact on the plug and the other lead on the directional side of the probe (the one with the black band).

The last step is to check the ¼” plug for any shorts. Using the meter, place the leads on each of the three plug contacts in different combinations: i.e the tip and the middle, the tip and the base and the middle and the base. If you get any type of resistance reading for any of the combinations, you have a short in the plug and you need to replace the probe. There is a chance that the short is caused by moisture in the plug. You can try heating the plug with a hair dryer to dry out the moisture. If you get no resistance reading from the test after drying the plug then the probe is still functional.
Signal Processing Units

LT2100 and LT2200 Models

To check the unit, start by removing the screws and the top like you are changing the batteries. Remove the batteries and check the voltage using the volt meter. The batteries should read 9+ volts DC. If the batteries are lower replace them with new ones.

Next, check the battery holders for any corrosion. Clean the holders with contact cleaner if needed.

Using the contact cleaner, spray the main part of the rotary switch to clean any corrosion on the switch contacts.  Turn the switch back and forth 10 to 20 times. Blow off the switch with the canned air. Repeat the process one more time.

Check for other corrosion on the circuit board, especially on the ends of the wide ribbon cable that connects the main circuit board and the front panel. If there is any corrosion, spray with contact cleaner and clean with a brush or cloth.

Tighten any of the cable connectors on the back panel with a wrench.

Reinstall the batteries and the top of the box. Turn the power switch to low, medium and high. You should get a clicking sound an all three positions. If you do not, rotate the switch 10 to 20 times to see if that cleans off any corrosion and improves the clicking.

LT2400 Model

This model has digital circuitry and components and therefore doesn’t require as much maintenance.

Check the 2 AA batteries to make sure they are 1.5+ volts each. Also check the battery clips to make sure they are not rusted or corroded. Turn the unit on to make sure you can switch between all three positions.

Booster Box  

Remove the screws and the bottom panel.

Check the batteries, battery holders, and clips. The battery holders and clips should not have any rust or corrosion on the springs or contacts. If they do, you can try to clean the corrosion but it is best to replace the battery holders. These are standard 8 pack AA battery holders. If you cannot find them locally give us a call, we have them in-stock.

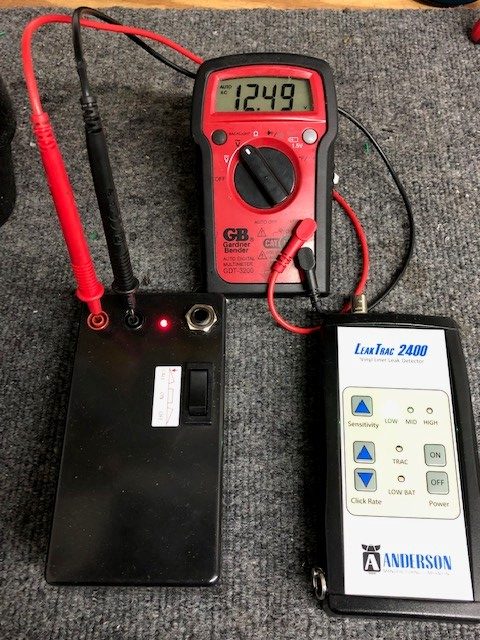
With the batteries reinstalled in the holders, use a volt meter to measure the voltage. Each battery pack should measure 12.5+ volts DC for each pack.

For the LT2100 and LT2200 models, remove the white plastic divider and examine the circuit board for any corrosion. Clean any corrosion with the contact cleaner and a brush or air duster.

Reconnect and replace the battery packs into the booster box.

Next we will check the output voltage of the booster. Turn on the SPU and the booster by using the stitch or button on the top of the booster.  (If you have a LT2100 model you will need to plug in the long booster cable before turning the unit on.) Using a volt meter set on AC current, place the meter leads in the two small plugs on the top of the booster. These are the red and black plugs where the float and ground wire connect. You should measure between 10 and 12 volts AC. If you do not get this voltage reading give us a call and our repair technician can help determine the problem.
 

A video explanation of this process is also available on YouTube. It features a LeakTrac 2100, but much of the process is still applicable for newer versions. Part One covers the Booster Box and SPU and Part Two covers all of the cables and the Probe.

If you run into any issues as you’re performing the tune up don’t hesitate to give us a call! We’re happy to trouble shoot with you over the phone.
Built to Last

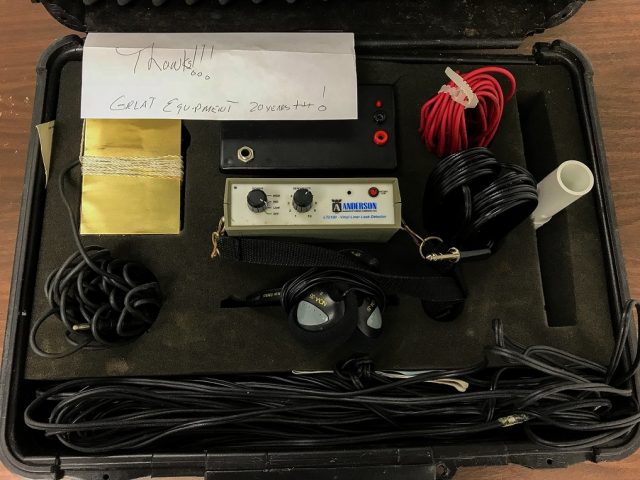
We rarely toot our own horn, but sometimes we get feedback that’s too good to keep to ourselves. We recently got a LeakTrac 2100 back for service that had been used in the field for 20+ years! After a quick tune up we were able to get it ready to keep finding leaks.

LeakTrac2100 sent in for service, over 20 years old

This is actually a  common experience here at Anderson Manufacturing. We build our equipment to last, so you can depend on it for year after year. If something isn’t working quite right for you, send it in for service and we should be able to get it running like new in no time.

Investing in quality pays off!


Case Study: More than Meets the Eye

Type of Pool:

Vinyl liner

Equipment Used:

Leakalyzer, LeakTrac 2400, Dye

Situation:

The customer called us because they noticed the equipment pad was always wet, and the water level was dropping in the pool (estimated at ½” per day). They could not identify where the water was coming from, but thought the heater may be the problem.

Solution:

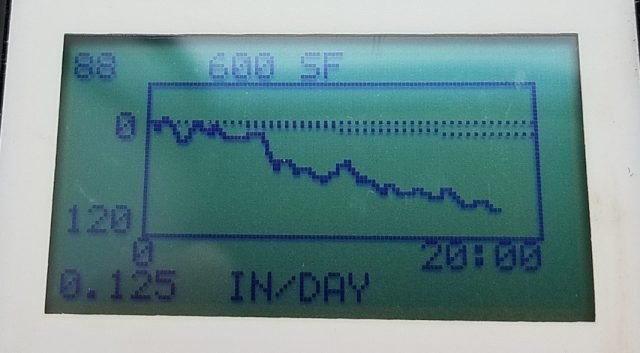
On arrival we ran a Leakalyzer test that showed .6” of water loss per day.

As the customer had reported, the equipment pad was very wet but we found that the heater was dry. We then lifted up the pump, which made a leak under the pump visible.

With the pump off, we then ran another Leakalyzer test that still showed .39” per day of loss, which meant that the equipment leak was only producing .21” of loss per day, so there must be an additional leak in the pool. We started examining the shell of the pool by dye testing a few areas where there had been previous repairs, but none of them drew dye. We than ran the LeakTrac 2400 which led us to two leaks in the same corner: one where a patch was leaking again, and a new hole in the liner about 6” away from the other leak. The LeakTrac 2400 could clearly differentiate between the two holes even though they were close together.

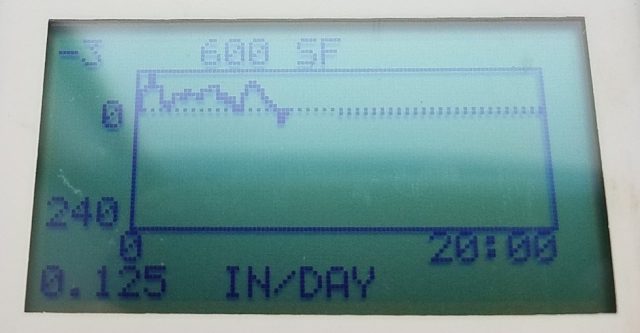
After patching the liner leaks we ran another Leakalyzer test with the pump off that showed no water loss, meaning the only leak left was the one in the pump. Not only did the Leakalyzer help us determine that there were multiple leaks in the pool, but it also confirmed that we had found all of the problems before leaving.

Learnings:

  1. Just because you find an obvious leak doesn’t mean you’ve found all of the problems at a pool – the Leakalyzer can help avoid that mistake!
  2. The LeakTrac 2400 can find multiple leaks in a pool, even if they’re close together.

LeakTrac Tip: Sound Intensity Can Provide Clues About Leaks Outside of Vinyl Liner

While the LeakTrac is designed to specifically find leaks in vinyl liners, listening carefully to the sounds it makes can give you clues as to other issues in the pool. Since the LeakTrac locates leaks by picking up a connection to ground through the leak, it also picks up connections to ground through metal elements in the pool such as light niches or gasket screws even when they aren’t losing water. While we recommend other tools to specifically locate the leaks in these areas, a stronger signal or noise than what is expected from the LeakTrac around these areas could be a clue to your water loss problem.

Man uses LeakTrac 2400 near skimmer

As you use the LeakTrac you will become familiar with how electricity flows through the pool and what levels of intensity to expect around common ground connections such as skimmers. If you notice that the LeakTrac is giving you a stronger signal than normal at a skimmer or stair gasket, the LeakTrac could very well be reading a leak on top of the normal screw ground connection that should be investigated further. While the LeakTrac’s primary purpose will always be finding holes in vinyl liners, understanding how the science behind the equipment works and paying attention to the signals it’s giving you can increase the value you get from the tool.


Case Study: Air Escaping From a Leak is Loud

Type of Pool:

Vinyl Liner

Equipment Used:

Leakalyzer, LeakTrac 2400, Pressure Testing Equipment, Dye

Situation:

This job started as a request for us to run a vinyl liner scan with the LeakTrac because the customer had a leak that they suspected was in the liner in a swim ledge. So, when we arrived at the pool we did a scan of the liner, which showed the suspected swim ledge wasn’t actually a problem. The LeakTrac did locate a small leak on the vinyl stairs, but this leak didn’t draw enough dye to be the source of significant water loss. We quickly patched this leak with a Leakmaster Peel and Stick Patch before moving on to do a full leak detection.

Image of Pool

Solution:

With a quick pressure test we found a skimmer line was not holding pressure. We then switched from inducing pressure with water to inducing pressure with air and heard a loud bubbling and gurgling sound  right in the skimmer bowl without even using a listening device.  The leak turned out to be a broken pipe just below the skimmer bowl.

To verify the rest of the line was good we dropped a 550 inflatable plug with an extension hose in past the leak and found the rest of the line held pressure.

A repair was scheduled for a later date, but before leaving the pool we plugged the skimmer line and ran a Leakalyzer test to confirm all leaks had been found.

Learnings:

  1. Pressure testing is a quick way to isolate a pipe leak
  2. Air escaping from leak in pipe makes a great noise for sonic location
  3. The LeakTrac not only can be used to find leaks, but also to eliminate the liner as the location of a leak if no leaks are found


Case Study: Leakalyzer Saves Callback

Type of Pool:

Vinyl / Indoor

Equipment Used:

LeakTrac  2400, Leakalyzer, Dye

Situation:

Customer told us that pool leaked down to 1” above the skimmer pretty quickly, then seemed to hold at that level.

Solution:

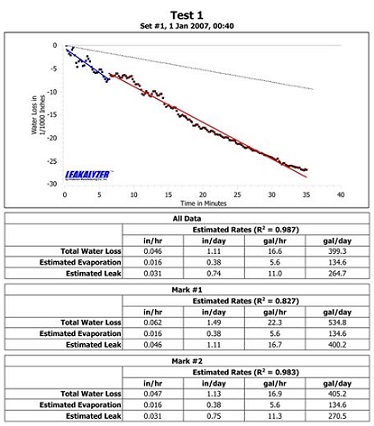
When we arrived at the job site we started our Leakalyzer test with the pump on which confirmed the water loss. After turning the pump off and marking the current test, we could see that the slope of the line continued to be the same as during the pump off test.  Because of this we suspected a shell leak. Our observations of the pool equipment and plumbing system validated that the plumbing didn’t appear to be the problem.

Since a shell leak was suspected we began systematically dye testing the pool from the deck. By doing so we were able to find a crack in the skimmer bowl at the same level the customer indicated the pool water level held at. The size of the crack seemed consistent with what the customer and Leakalyzer indicated the water loss would be.

We then patched the skimmer with the Leakmaster Pool Glue Kit, which is adheres very well to the skimmer bowl and works underwater.  After the patch we ran another Leakalyzer test to verify that the pool had stopped leaking. Although not as much as the first time, the test still showed water loss that was more than estimated evaporation.

With additional dye testing we quickly found another small leak in opposite skimmer. That leak was patched with Quick Set Putty.

We ran yet another Leakalyzer test and found the pool was losing less water than before, but still losing.

We finished checking fittings and gaskets with dye and then pulled out the LeakTrac. The LeakTrac was able to pinpoint one hole in the liner and eliminate the rest of the liner as a suspect area. Leakmaster Flexible Sealer and Leakmaster Peel and Stick Vinyl Pool Patches were used to patch the leak in the vinyl liner.

The water level was a little too turbulent after patching to get a great Leakalyzer test, but we spoke with the customer one week later and pool was not losing water.

Learnings:

  • The Leakalyzer helped us make sure all the leaks were found before leaving the job, instead of just finding the first one
  • Dye testing is really fast and effective
  • Gathering good information from the customer shortened the leak detection process

LT2200 vs LT2400

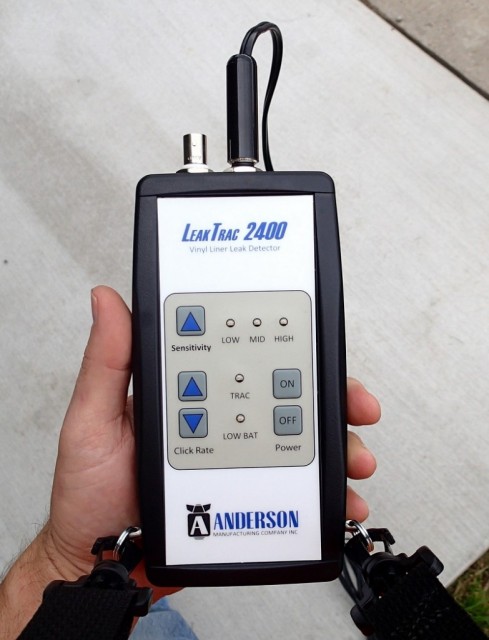
We often get asked from current users of LeakTrac 2100 or 2200 units about the differences in the new LeakTrac 2400. The new device operates in a very familiar way yet offers a number of advantages which are the result the more robust, energy efficient, and feature rich digital circuitry.

Here’s what’s new:

1. Touch pad controls will reduce problems related to corrosion build-up on knob contacts.

Updated SPU helps limit corrosion build up.

2. Digitally controlled speaker enables pitch variation as well as click rate variation when you’re zeroing in on a leak. In addition to helping to pinpoint problems this feature also enable you to perform Jimi Hendrix-like LeakTrac solos when the audience demands.

3. The new unit uses a more robust and conventional wireless frequency (2.4 Ghz)  for communication between the Booster and the SPU. This change will be especially important to our international customers who can now be assured that the unit conforms to international wireless standards.

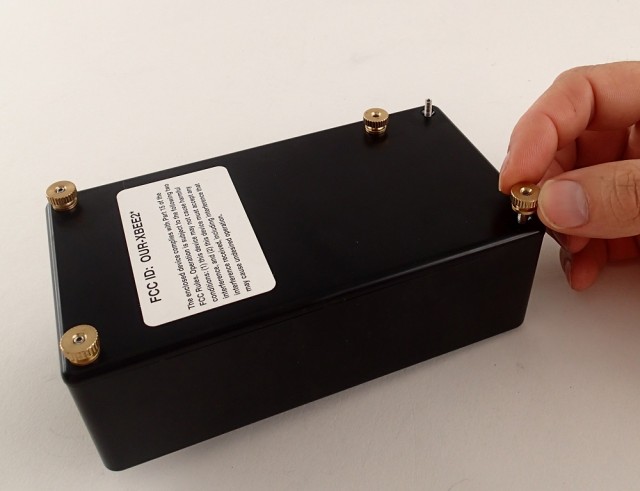
4. The Power requirement of the Booster has been reduced from sixteen to eight AA batteries. These batteries can be more easily changed with brass knobs on the bottom of the unit rather than the  screws on older units that were prone to stripping.

New Thumb Screws makes changing batteries more convenient.
New Thumb Screws makes changing batteries easier and faster.

5. The SPU now uses 2 AA batteries which can be easily replaced by opening a snap-on access panel. No more awkward dis-assembly of the entire unit in order to replace batteries. One supply of AA batteries will keep you prepared to replenish both the Booster and the SPU.

Overall the LT400 provides the same accurate and dependable results our customers have come to rely on over the last 20 years to help build their leak detection businesses and find leaks in vinyl liners.


Visa, Discover, MasterCard, American Express, & PayPal